The appeal is easy to understand: they bring character, scale, and warmth that a single framed piece rarely manages on its own. And yet plenty of people hesitate, put off by the prospect of drilling holes, restricted by rental agreements, or simply unsure where to start. Here’s the reassuring part: a professionally styled gallery wall is entirely achievable without touching a single tool. Interior designers like Sophie Robinson and Emily Henderson both advocate laying out every arrangement on the floor — or mapping it with paper templates — before anything goes near the wall. It’s an approach that actually produces better results, tool-free or not.
A High-Impact Wall, Zero Toolbox Required
Understanding Your Space
Gallery walls are among the most expressive and adaptable approaches in home décor, a curated mix of art, photographs, and objects that turns a blank surface into something genuinely personal.
Before choosing a single frame, spend a moment reading the wall itself. Note its width, height, and how it relates to the furniture around it. A guideline borrowed from museum and gallery practice places the center of an arrangement at roughly 57–60 inches from the floor — a height that feels natural to the eye whether you’re standing or seated. Step back at a few different distances to get a sense of how the wall sits within the broader room.
For maximum visual impact, the best candidates are the wall above a sofa, bed, or console table, or a longer hallway or staircase. Walls that are very small or architecturally busy tend to create visual noise rather than a focal point, so look for a surface with enough clear space for the arrangement to breathe.
Curating a Cohesive Collection
What separates an intentional gallery wall from a chaotic one is usually a common thread, a consistent color palette, a shared subject matter, or a unified framing style. That doesn’t mean everything has to match. Family snapshots can sit comfortably alongside travel photography or abstract prints, as long as they share something: a tone, a finish, or even a recurring accent color.
Mix sizes with purpose. Most designers recommend anchoring the arrangement with one to three larger “hero” pieces, then filling in with smaller and medium works around them. Mirrors, lightweight textiles, and sculptural objects can all add dimension, provided they’re light enough to work with no-tool hanging methods.
Planning the Layout Before Touching the Wall
Clear a section of floor that roughly matches your wall’s dimensions. Start arranging your frames there, placing the largest piece slightly off-center first, then building outward from it. Keep gaps consistent – about 2–3 inches between frames tends to maintain cohesion without the arrangement feeling crowded.
Once you’re satisfied with the floor layout, photograph it on your phone. That image becomes your reference guide throughout the entire hanging process.
From there, trace each frame onto scrap paper — newspaper or kraft paper works perfectly well. Cut the shapes out, label them, and lightly tape them to the wall using low-tack tape. Adjust spacing and height by eye, looking for areas where visual weight clusters too heavily, and making sure bolder or darker pieces are spread across the arrangement rather than grouped together. Professional decorators widely recommend this template method precisely because it removes the guesswork — and spares your walls in the process.
Hanging Without Tools
For smooth, painted drywall, adhesive picture-hanging strips are the most dependable tool-free solution available. Removable hooks handle slightly heavier pieces, while poster putty works well for lightweight prints and postcards. Always check the manufacturer’s weight limits, confirm compatibility with your wall surface, and give the adhesive the recommended curing time before you hang anything.
Start with your largest anchor piece, then work outward, positioning each subsequent frame next to one that’s already in place to keep spacing consistent. Step back after every few additions — imbalances are far easier to spot mid-process than once everything is up. If a piece needs repositioning, peel adhesive tabs straight downward rather than outward to release them cleanly without damaging the wall.
Designing for Harmony
Color coordination doesn’t require matching frames. Neutral frames paired with bold artwork, or mixed metallics used consistently throughout, both read as deliberate choices. Connecting your wall to the room’s existing palette – picking up colors from a rug, cushions, or curtains – gives the arrangement a sense of belonging rather than an afterthought quality.
Some modular display systems are designed specifically to let you build and rearrange gallery walls incrementally, which suits anyone who wants to grow or evolve their collection over time without committing to a fixed layout.
A Living, Evolving Wall
Think of your gallery wall as an ongoing project rather than a finished one. Swap in children’s drawings, replace travel photos as new trips happen, or refresh seasonal displays using the same hooks and strips already in place. The only routine maintenance involved is checking that frames are still straight and that adhesive is holding and keeping heavier, glass-fronted pieces away from high-traffic areas or above beds when relying solely on adhesive methods.
If the whole process feels daunting, start with just three to five pieces. A well-planned, no-tool gallery wall is more than decoration – it’s a personal story told in layers, built through patience and creativity rather than a power drill.


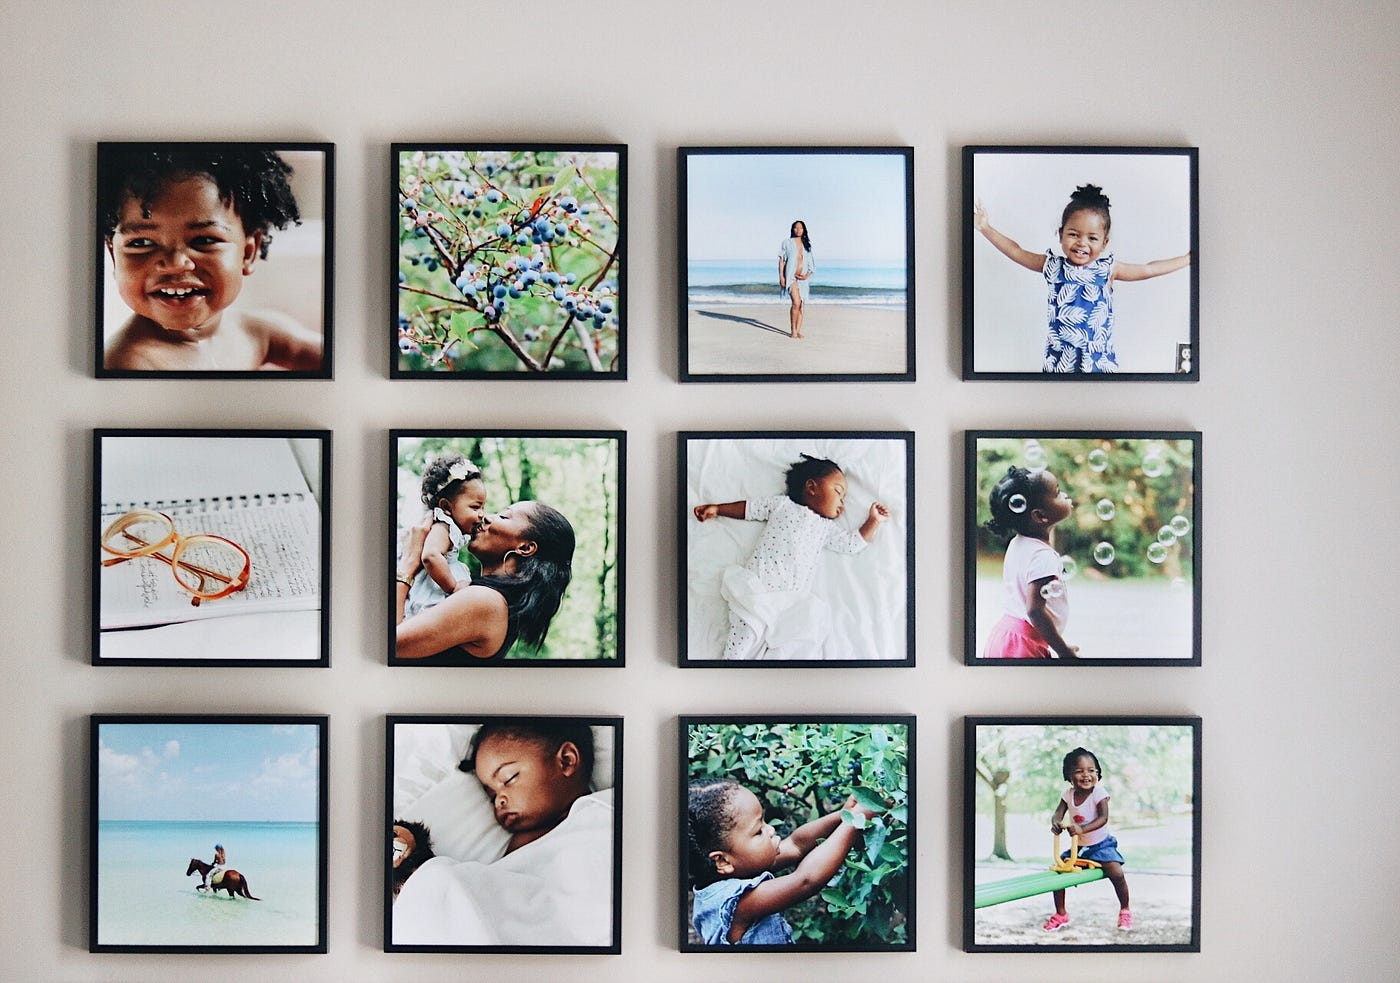
The appeal is easy to understand: they bring character, scale, and warmth that a single framed piece rarely manages on its own. And yet plenty of people hesitate, put off by the prospect of drilling holes, restricted by rental agreements, or simply unsure where to start. Here’s the reassuring part: a professionally styled gallery wall is entirely achievable without touching a single tool. Interior designers like Sophie Robinson and Emily Henderson both advocate laying out every arrangement on the floor — or mapping it with paper templates — before anything goes near the wall. It’s an approach that actually produces better results, tool-free or not.
A High-Impact Wall, Zero Toolbox Required
Understanding Your Space
Gallery walls are among the most expressive and adaptable approaches in home décor, a curated mix of art, photographs, and objects that turns a blank surface into something genuinely personal.
Before choosing a single frame, spend a moment reading the wall itself. Note its width, height, and how it relates to the furniture around it. A guideline borrowed from museum and gallery practice places the center of an arrangement at roughly 57–60 inches from the floor — a height that feels natural to the eye whether you’re standing or seated. Step back at a few different distances to get a sense of how the wall sits within the broader room.
For maximum visual impact, the best candidates are the wall above a sofa, bed, or console table, or a longer hallway or staircase. Walls that are very small or architecturally busy tend to create visual noise rather than a focal point, so look for a surface with enough clear space for the arrangement to breathe.
Curating a Cohesive Collection
What separates an intentional gallery wall from a chaotic one is usually a common thread, a consistent color palette, a shared subject matter, or a unified framing style. That doesn’t mean everything has to match. Family snapshots can sit comfortably alongside travel photography or abstract prints, as long as they share something: a tone, a finish, or even a recurring accent color.
Mix sizes with purpose. Most designers recommend anchoring the arrangement with one to three larger “hero” pieces, then filling in with smaller and medium works around them. Mirrors, lightweight textiles, and sculptural objects can all add dimension, provided they’re light enough to work with no-tool hanging methods.
Planning the Layout Before Touching the Wall
Clear a section of floor that roughly matches your wall’s dimensions. Start arranging your frames there, placing the largest piece slightly off-center first, then building outward from it. Keep gaps consistent – about 2–3 inches between frames tends to maintain cohesion without the arrangement feeling crowded.
Once you’re satisfied with the floor layout, photograph it on your phone. That image becomes your reference guide throughout the entire hanging process.
From there, trace each frame onto scrap paper — newspaper or kraft paper works perfectly well. Cut the shapes out, label them, and lightly tape them to the wall using low-tack tape. Adjust spacing and height by eye, looking for areas where visual weight clusters too heavily, and making sure bolder or darker pieces are spread across the arrangement rather than grouped together. Professional decorators widely recommend this template method precisely because it removes the guesswork — and spares your walls in the process.
Hanging Without Tools
For smooth, painted drywall, adhesive picture-hanging strips are the most dependable tool-free solution available. Removable hooks handle slightly heavier pieces, while poster putty works well for lightweight prints and postcards. Always check the manufacturer’s weight limits, confirm compatibility with your wall surface, and give the adhesive the recommended curing time before you hang anything.
Start with your largest anchor piece, then work outward, positioning each subsequent frame next to one that’s already in place to keep spacing consistent. Step back after every few additions — imbalances are far easier to spot mid-process than once everything is up. If a piece needs repositioning, peel adhesive tabs straight downward rather than outward to release them cleanly without damaging the wall.
Designing for Harmony
Color coordination doesn’t require matching frames. Neutral frames paired with bold artwork, or mixed metallics used consistently throughout, both read as deliberate choices. Connecting your wall to the room’s existing palette – picking up colors from a rug, cushions, or curtains – gives the arrangement a sense of belonging rather than an afterthought quality.
Some modular display systems are designed specifically to let you build and rearrange gallery walls incrementally, which suits anyone who wants to grow or evolve their collection over time without committing to a fixed layout.
A Living, Evolving Wall
Think of your gallery wall as an ongoing project rather than a finished one. Swap in children’s drawings, replace travel photos as new trips happen, or refresh seasonal displays using the same hooks and strips already in place. The only routine maintenance involved is checking that frames are still straight and that adhesive is holding and keeping heavier, glass-fronted pieces away from high-traffic areas or above beds when relying solely on adhesive methods.
If the whole process feels daunting, start with just three to five pieces. A well-planned, no-tool gallery wall is more than decoration – it’s a personal story told in layers, built through patience and creativity rather than a power drill.
Share this:
Like this: