There are some people who seem to look naturally comfortable in every photograph. Their posture appears effortless, their smile looks genuine and they somehow know exactly where to place their hands. The good news is that being photogenic is not a mysterious quality that only a lucky few possess.
Looking better in photographs usually comes down to a handful of practical details: flattering light, relaxed posture, thoughtful positioning and feeling comfortable enough to look like yourself. You do not need professional makeup, expensive equipment or hours of editing. A few small adjustments can make an enormous difference.
Whether you are taking holiday photographs, updating a profile picture, attending a wedding or simply trying to feel more confident in front of the camera, these 15 tips will help you create photographs you genuinely enjoy looking back on.
1. Find the Most Flattering Light
Light has a greater effect on a photograph than almost anything else. Even a beautiful setting and carefully planned outfit can be undermined by harsh overhead lighting.
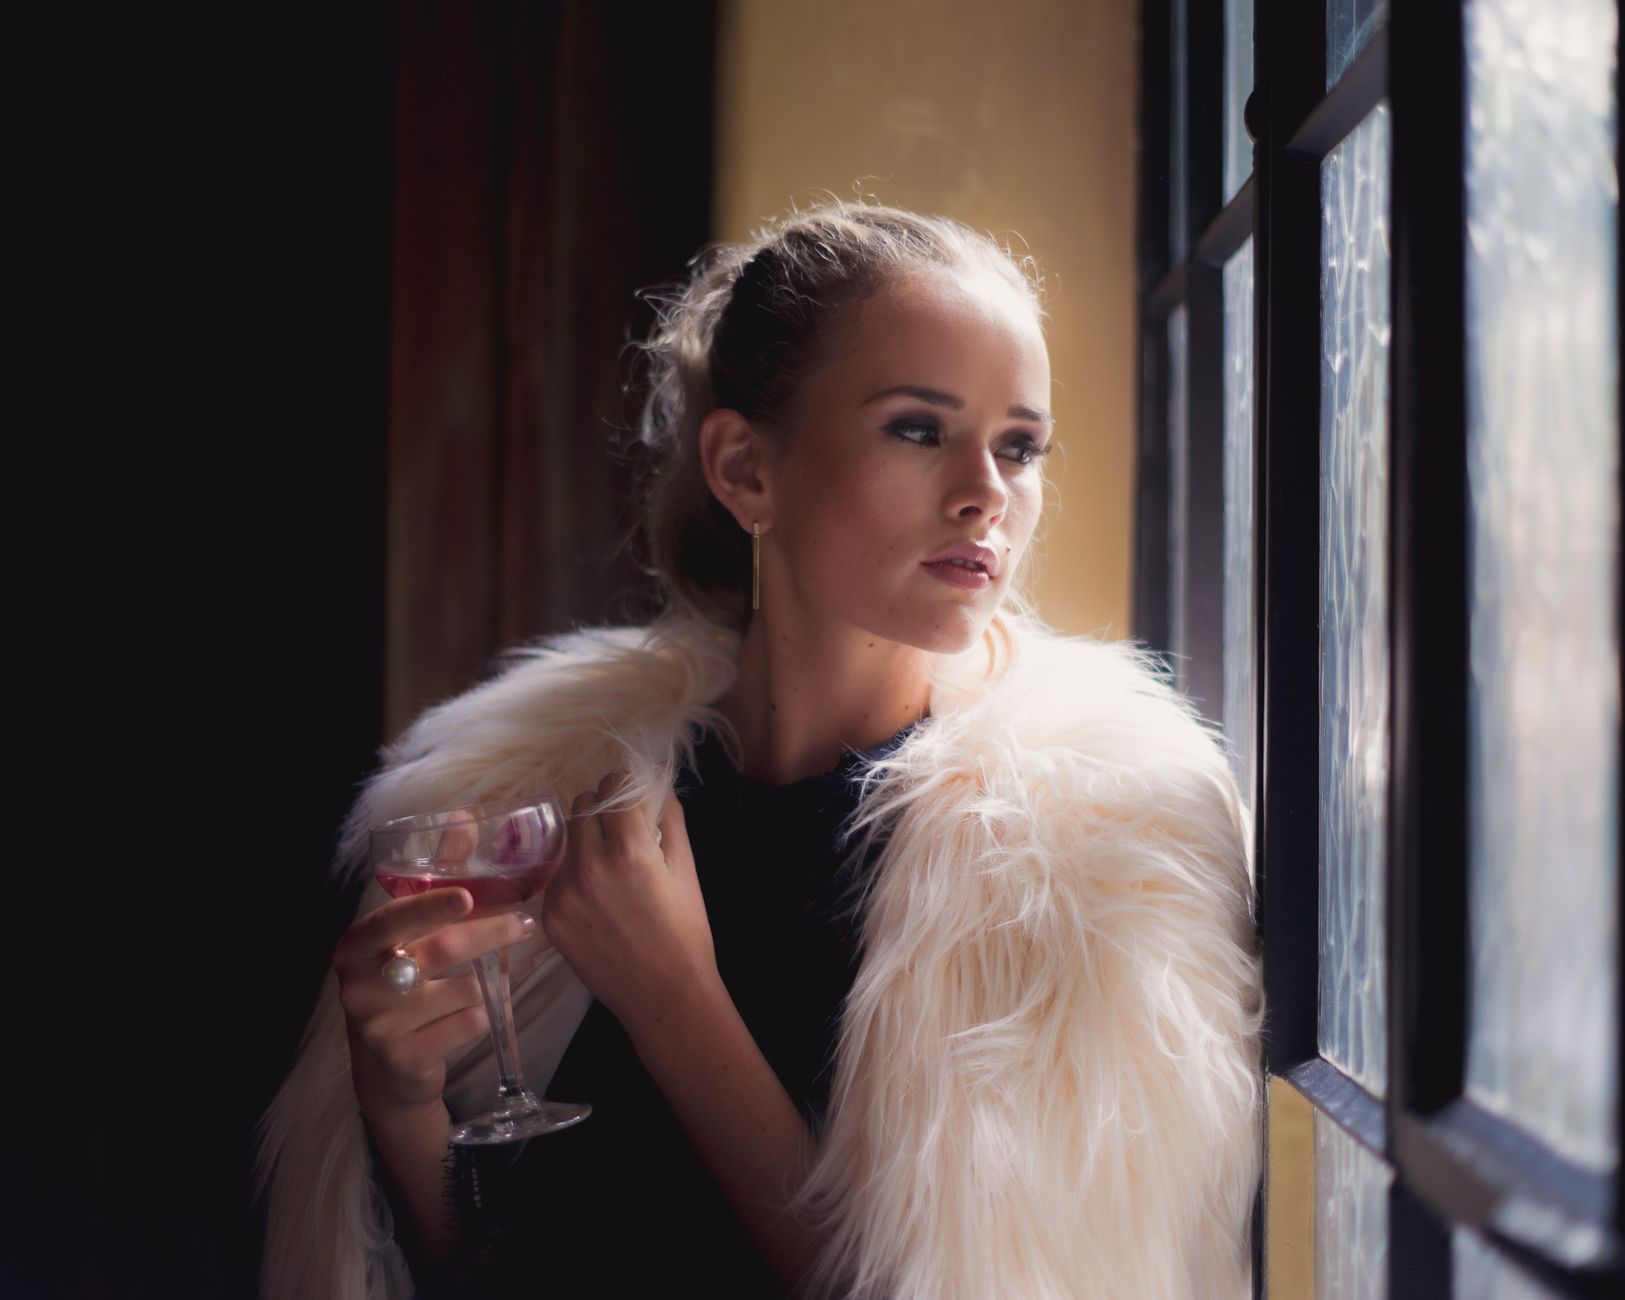
Soft natural light is generally the most flattering for portraits. Try standing near a large window, beneath a covered outdoor area or in open shade. These locations illuminate the face evenly without creating strong shadows beneath the eyes, nose or chin.
When taking photographs outside, early morning and late afternoon usually provide softer, warmer light than the middle of the day. The period shortly after sunrise or before sunset is commonly known as golden hour because of its warm, gentle appearance.
Cloudy days can also be wonderful for photographs. The clouds soften and spread the sunlight, creating an effect similar to a large natural diffuser.
Try to avoid standing directly beneath bright ceiling lights or facing strong midday sun. Both can create deep shadows and cause you to squint.
2. Face Towards the Light
Once you have found good light, position yourself so that it falls onto your face rather than coming from directly behind or above you. Stand facing a window or turn your body approximately 45 degrees towards the main light source. This helps illuminate the eyes and gives the face more definition.
Backlighting can create beautiful, dreamy photographs, particularly at sunset, but it is more difficult for an inexperienced photographer or smartphone camera to balance. The background may look perfect while your face appears too dark.
Before taking the photograph, look at where the brightest part of the scene is coming from and gently turn your face towards it.
3. Turn Your Body Slightly Away From the Camera
Standing completely square to the camera can make the body appear wider and the pose feel formal. Instead, rotate your torso slightly so that one shoulder is closer to the camera than the other.A 30-to-45-degree angle usually creates a more natural and flattering shape. You can then turn your face back towards the lens.
This pose works particularly well for full-length photographs, group pictures and travel photos. It gives the image depth and stops the body from appearing rigid. Avoid twisting so far that the pose feels uncomfortable. The movement should be subtle enough that you can hold it without looking tense.
Photo by Ali Foroozesh
4. Shift Your Weight Onto One Leg
Perfectly distributing your weight between both feet often creates a stiff, passport-photo stance. Instead, place most of your weight onto the leg furthest from the camera. Allow the other knee to bend slightly or bring one foot a little further forward. This naturally creates shape through the waist and hips while relaxing the upper body.
For a seated photograph, shift your weight slightly to one side rather than sitting completely flat and straight. Crossing the ankles can also create a more elegant line than tightly crossing the legs.
The goal is not to force your body into an exaggerated pose. It is simply to avoid standing as though you are waiting in a queue.
5. Create Space Between Your Arms and Body
Pressing your arms firmly against your sides can flatten them and make them appear wider in photographs.
Create a small amount of space by placing one hand lightly on your hip, holding a bag, resting your hand on a chair or allowing your elbow to move slightly away from your torso.
Keep the movement soft. A sharply angled elbow and firmly planted hand can look overly posed unless that is the style you want.
For group photographs, resist the temptation to squeeze every part of your body against the person beside you. Stand close enough to feel connected while leaving enough room for your posture to remain natural.
6. Move Your Chin Slightly Forward and Down
One of the simplest portrait tricks is to move your face very slightly towards the camera before lowering your chin a fraction.This can help define the jawline and prevent the camera from looking up beneath the chin. The movement will probably feel more noticeable than it appears in the finished photograph.
Do not pull your head backwards, as this can compress the neck and make the pose look tense. Think of lengthening the back of your neck and moving your forehead subtly towards the lens.
Keep the adjustment small. Pushing your head too far forward will look unnatural from the side.
7. Relax Your Mouth Before Smiling
A tense mouth is often more noticeable in a photograph than an imperfect smile. Before the picture is taken, gently exhale and relax your jaw. Allow your lips to part slightly before smiling. This can prevent the smile from looking forced or frozen.
If you struggle to smile naturally on command, ask the photographer to make you laugh, look briefly away from the camera or think about someone who makes you happy. A smile that builds naturally usually reaches the eyes and looks warmer than one held in place for several seconds.
It can also help to take photographs continuously while talking or laughing rather than relying on a single carefully timed frame.
Photo by Andrea Piacquadio
8. Give Your Hands Something Natural to Do
Hands are often the most awkward part of posing because we become suddenly aware of them as soon as a camera appears.
Rather than holding them stiffly by your sides, give them a simple purpose. You might:
Hold sunglasses, a coffee cup or a small bag
Lightly touch your hair
Place a hand in a pocket
Adjust a sleeve or piece of jewellery
Rest your hand against a railing, table or chair
Hold the edge of a jacket
Link arms with someone beside you
Keep your fingers loose rather than tightly curled. Try not to flatten your palm directly against your body, as this can make the hand appear larger.
Props can be particularly helpful during travel photographs because they give the image a sense of movement and context. Planning a professional holiday shoot? Our guide to organising a photoshoot in Rome includes advice on choosing locations, outfits, timing and photographers.
9. Keep Your Posture Long but Relaxed
Good posture makes almost every outfit and pose look better, but standing rigidly upright can be just as unflattering as slouching.
Imagine a thread gently lifting you from the crown of your head. Lengthen your spine, lower your shoulders and allow your chest to remain open. Avoid pulling your shoulders too far backwards, which can create tension through the neck and arms.
If you are sitting, move slightly towards the edge of the chair rather than sinking deeply into it. This naturally encourages a longer spine and prevents clothing from bunching around the middle. Take a breath before the picture is taken. Many people unknowingly raise their shoulders when they feel nervous.
10. Work Out Your Best Camera Height
The height of the camera changes the proportions of both the face and body. For a close-up portrait, positioning the camera at approximately eye level or slightly above often creates a flattering result. A camera held far below the face can emphasise the jaw and nostrils, while one held too high may distort the forehead and body.
For full-length outfit photographs, placing the camera somewhere around waist or chest height can help preserve natural proportions. Holding it too high may make the legs look shorter, while shooting from very low down can exaggerate the lower body.
The photographer should step backwards and use a moderate zoom rather than standing extremely close with a wide-angle lens. Smartphone cameras can distort features when held too near the face, particularly around the edges of the frame.
11. Avoid Standing Closest to a Wide-Angle Camera
In group photographs, the person closest to the lens often appears larger because of perspective distortion.
Try to stand on roughly the same plane as everyone else rather than several steps in front. If you are at the edge of the group, avoid leaning significantly towards the camera.
For selfies, hold the phone a little further away and use a modest zoom rather than placing it extremely close to your face. Keep your face near the centre of the frame, as wide-angle lenses tend to stretch subjects positioned near the edges.
When photographing several people, ask everyone to bring their faces to a similar distance from the lens.
12. Choose Clothes That Make You Feel Comfortable
An outfit does not need to be expensive or elaborate to photograph well. The most important factor is that it fits properly and allows you to move naturally.
Clothing that constantly needs adjusting will make you feel self-conscious and may affect your posture. Before the photograph, check for twisted straps, uneven hems, bunched fabric, visible undergarments or pockets that are sticking out.
Solid colours, subtle textures and simple patterns are generally easier to photograph than extremely busy prints. If the background is visually detailed, a simpler outfit helps prevent the image from feeling cluttered.
Consider how the colour will work with the setting. Cream, terracotta, soft blue and earthy tones can look beautiful against warm European architecture, while brighter shades may stand out against beaches, gardens and neutral urban backgrounds.
For holiday shoots, choose clothes that reflect the destination while still feeling like you. Our guide to packing properly for your next trip includes practical advice for organising clothing, beauty products and travel essentials.
13. Prepare Your Skin Without Overdoing It
Healthy, comfortable skin generally photographs better than skin covered in a heavy layer of unfamiliar products.
In the days before an important event or photoshoot, focus on hydration and products you already know work for you. Avoid experimenting with strong exfoliants, peels or new treatments immediately beforehand.
On the day, moisturise well and apply makeup in thin layers. A small amount of concealer, cream blush and softly defined brows may be all you need for an everyday photograph.
Very shiny areas can reflect strong light, so consider gently pressing translucent powder onto the centre of the forehead, around the nose and across the chin. Leave some natural luminosity on the higher points of the face rather than mattifying everything.
Our guide to unlocking beautiful skin explores skincare, nutrition, sleep and stress management, while these Hollywood skin tips offer more ideas for creating a healthy-looking glow.
14. Add Movement Instead of Holding a Pose
Some of the best photographs are captured between formal poses. Walk slowly towards the camera, look over your shoulder, adjust your jacket, turn towards a friend or allow your hair and clothing to move naturally. Movement can soften the body and create expressions that feel more spontaneous.
Ask the photographer to use burst mode or take several frames while you move. The first image may feel awkward, but the later ones often become more relaxed.
Movement is especially useful if you dislike staring directly into the lens. You can begin by looking away, then gradually turn towards the camera as photographs are being taken.
Try simple actions such as:
Walking across the frame
Taking a small step forward
Looking down and then lifting your eyes
Turning your body towards the camera
Laughing with someone outside the frame
Tucking your hair behind your ear
Leaning against a wall and then moving away
The aim is not to perform an elaborate routine. Small, controlled movements are enough.
15. Take More Photographs Than You Think You Need
Even professional photographers rarely rely on a single frame. Facial expressions change in fractions of a second, eyes blink and clothing shifts.
Take several photographs from the same position, making slight adjustments between each one. Change the angle of your shoulders, move your chin, alter the position of your hands and try both smiling and neutral expressions.
Review the images after a few minutes rather than after every single photograph. Constantly stopping to examine yourself can make you more self-conscious and interrupt the rhythm of the shoot.
Once you identify a pose or angle you like, repeat it with small variations. Over time, you will learn which positions feel comfortable and consistently work for you.
Photo by Carol Lemos
How to Look More Natural in Photographs
Looking natural does not necessarily mean standing completely still and hoping for the best. Most relaxed-looking photographs involve a little direction.
Start by placing your body at a slight angle, shifting your weight onto one leg and giving your hands something simple to do. Then take a breath, relax your jaw and look away from the camera.
Ask the photographer to begin shooting before you turn back towards the lens. This often captures a softer, less prepared expression.
It also helps to stop thinking about whether you look attractive. Instead, focus on what is happening around you. Listen to the person taking the photograph, notice the setting or interact with someone nearby.
The more present you feel, the less likely you are to adopt the tense expression that comes from closely monitoring yourself.
How to Look Better in Travel Photographs
Travel photographs often involve unfamiliar settings, unpredictable weather and limited time. A little preparation can help without turning the experience into a full production.
Research one or two attractive locations before you arrive, but leave room for spontaneous moments. Early morning is often quieter at popular landmarks and may offer softer light.
Wear comfortable shoes between locations and bring a small kit containing:
Lip balm or lipstick
Face powder or blotting paper
A comb or small brush
Hair ties and pins
Sunglasses
A lint roller
Water
A light layer for changing weather
Do not spend the entire experience trying to create a perfect image. Photograph the unplanned details too: a café table, a market visit, a windy coastal walk or a quiet street discovered by accident.
Great travel photography should preserve how a place felt, not only prove that you stood in front of its best-known landmark. For more inspiration, explore our guides to the South of France, Sardinia and the Hamptons, all filled with photogenic towns, beaches and landscapes.
Common Photography Mistakes to Avoid
A few small habits can make photographs feel less flattering than they need to be.
Holding your breath
This creates tension through the mouth, neck and shoulders. Exhale gently just before the photograph is taken.
Pulling your head backwards
This shortens the neck and softens the jawline. Move your head very slightly forward instead.
Forcing a smile for too long
Reset your expression between photographs. Look away, relax your face and smile again when you are ready.
Standing completely square
Turn your body slightly and shift your weight to create a more natural shape.
Taking the picture too close
Move the camera further away and use a moderate zoom to reduce wide-angle distortion.
Ignoring the background
Check for bins, signs, poles, strangers or objects that appear to grow out of your head. Moving half a metre can transform the composition.
Overediting the final image
Adjusting brightness, contrast and crop can improve a photograph. Excessively smoothing skin or changing facial features can remove the character that made the image feel like you.
Frequently Asked Questions
Why do I look different in photographs than in the mirror?
A mirror shows a reversed version of your face, which is the version you see most frequently. Photographs usually show your face without that reversal, so small natural asymmetries may feel more noticeable to you. Camera lenses, distance, lighting and angle can also affect proportions.
What is the most flattering angle for a photograph?
There is no single angle that suits everyone, but turning the body approximately 30 to 45 degrees away from the camera is a reliable starting point. Keep the face directed towards the light and move the chin slightly forward and down.
Should the camera be above or below eye level?
For head-and-shoulder portraits, eye level or slightly above is generally flattering. For full-length photographs, positioning the camera around waist or chest height can help keep the body’s proportions looking natural.
How can I make my face look slimmer in pictures?
Turn your face slightly rather than presenting it completely straight to the camera. Move your chin gently forward and down, use soft frontal light and avoid placing the camera very close to your face.
How do I smile naturally in photographs?
Relax your jaw, exhale and think about something genuinely amusing or comforting. Looking away before turning towards the camera can also produce a more natural expression. Ask the photographer to take several frames while you talk or laugh.
Where should I look when having my photograph taken?
Look directly into the lens rather than at your own image on the screen. For a more candid result, look slightly past the camera, towards the light or at another person nearby.
What should I do with my hands in photographs?
Hold a small object, place one hand in a pocket, adjust your clothing, touch your hair or rest your hand lightly on a nearby surface. Keep the fingers soft and slightly separated.
What colours photograph best?
The best colour depends on your skin tone, the lighting and the background. Solid colours and subtle textures tend to photograph reliably. Consider choosing a shade that contrasts gently with the setting so you do not disappear into the background.
How can I look good in a group photograph?
Stand on the same plane as the other people, angle your body slightly and avoid leaning closer to the camera than everyone else. Create a little space around your arms while still connecting naturally with the group.
How can I become more confident in front of a camera?
Practise a few poses at home and identify the angles that feel comfortable. During the photograph, focus on your surroundings rather than analysing your appearance. Taking more pictures also helps because you are no longer relying on one supposedly perfect moment.
The Final Word
Looking better in photographs is not about hiding every perceived flaw or trying to become a different version of yourself. It is about understanding how light, posture, angles and movement translate through a camera.
Begin with soft light, turn your body slightly, relax your shoulders and allow yourself to move. Take enough photographs to get past the first few awkward frames and remember that the images you treasure most may not be the technically perfect ones. They are often the photographs in which you look happy, comfortable and completely yourself.


There are some people who seem to look naturally comfortable in every photograph. Their posture appears effortless, their smile looks genuine and they somehow know exactly where to place their hands. The good news is that being photogenic is not a mysterious quality that only a lucky few possess.
Looking better in photographs usually comes down to a handful of practical details: flattering light, relaxed posture, thoughtful positioning and feeling comfortable enough to look like yourself. You do not need professional makeup, expensive equipment or hours of editing. A few small adjustments can make an enormous difference.
Whether you are taking holiday photographs, updating a profile picture, attending a wedding or simply trying to feel more confident in front of the camera, these 15 tips will help you create photographs you genuinely enjoy looking back on.
1. Find the Most Flattering Light
Light has a greater effect on a photograph than almost anything else. Even a beautiful setting and carefully planned outfit can be undermined by harsh overhead lighting.
Soft natural light is generally the most flattering for portraits. Try standing near a large window, beneath a covered outdoor area or in open shade. These locations illuminate the face evenly without creating strong shadows beneath the eyes, nose or chin.
When taking photographs outside, early morning and late afternoon usually provide softer, warmer light than the middle of the day. The period shortly after sunrise or before sunset is commonly known as golden hour because of its warm, gentle appearance.
Cloudy days can also be wonderful for photographs. The clouds soften and spread the sunlight, creating an effect similar to a large natural diffuser.
Try to avoid standing directly beneath bright ceiling lights or facing strong midday sun. Both can create deep shadows and cause you to squint.
2. Face Towards the Light
Once you have found good light, position yourself so that it falls onto your face rather than coming from directly behind or above you. Stand facing a window or turn your body approximately 45 degrees towards the main light source. This helps illuminate the eyes and gives the face more definition.
Backlighting can create beautiful, dreamy photographs, particularly at sunset, but it is more difficult for an inexperienced photographer or smartphone camera to balance. The background may look perfect while your face appears too dark.
Before taking the photograph, look at where the brightest part of the scene is coming from and gently turn your face towards it.
3. Turn Your Body Slightly Away From the Camera
Standing completely square to the camera can make the body appear wider and the pose feel formal. Instead, rotate your torso slightly so that one shoulder is closer to the camera than the other.A 30-to-45-degree angle usually creates a more natural and flattering shape. You can then turn your face back towards the lens.
This pose works particularly well for full-length photographs, group pictures and travel photos. It gives the image depth and stops the body from appearing rigid. Avoid twisting so far that the pose feels uncomfortable. The movement should be subtle enough that you can hold it without looking tense.
4. Shift Your Weight Onto One Leg
Perfectly distributing your weight between both feet often creates a stiff, passport-photo stance. Instead, place most of your weight onto the leg furthest from the camera. Allow the other knee to bend slightly or bring one foot a little further forward. This naturally creates shape through the waist and hips while relaxing the upper body.
For a seated photograph, shift your weight slightly to one side rather than sitting completely flat and straight. Crossing the ankles can also create a more elegant line than tightly crossing the legs.
The goal is not to force your body into an exaggerated pose. It is simply to avoid standing as though you are waiting in a queue.
5. Create Space Between Your Arms and Body
Pressing your arms firmly against your sides can flatten them and make them appear wider in photographs.
Create a small amount of space by placing one hand lightly on your hip, holding a bag, resting your hand on a chair or allowing your elbow to move slightly away from your torso.
Keep the movement soft. A sharply angled elbow and firmly planted hand can look overly posed unless that is the style you want.
For group photographs, resist the temptation to squeeze every part of your body against the person beside you. Stand close enough to feel connected while leaving enough room for your posture to remain natural.
6. Move Your Chin Slightly Forward and Down
One of the simplest portrait tricks is to move your face very slightly towards the camera before lowering your chin a fraction.This can help define the jawline and prevent the camera from looking up beneath the chin. The movement will probably feel more noticeable than it appears in the finished photograph.
Do not pull your head backwards, as this can compress the neck and make the pose look tense. Think of lengthening the back of your neck and moving your forehead subtly towards the lens.
Keep the adjustment small. Pushing your head too far forward will look unnatural from the side.
7. Relax Your Mouth Before Smiling
A tense mouth is often more noticeable in a photograph than an imperfect smile. Before the picture is taken, gently exhale and relax your jaw. Allow your lips to part slightly before smiling. This can prevent the smile from looking forced or frozen.
If you struggle to smile naturally on command, ask the photographer to make you laugh, look briefly away from the camera or think about someone who makes you happy. A smile that builds naturally usually reaches the eyes and looks warmer than one held in place for several seconds.
It can also help to take photographs continuously while talking or laughing rather than relying on a single carefully timed frame.
8. Give Your Hands Something Natural to Do
Hands are often the most awkward part of posing because we become suddenly aware of them as soon as a camera appears.
Rather than holding them stiffly by your sides, give them a simple purpose. You might:
Keep your fingers loose rather than tightly curled. Try not to flatten your palm directly against your body, as this can make the hand appear larger.
Props can be particularly helpful during travel photographs because they give the image a sense of movement and context. Planning a professional holiday shoot? Our guide to organising a photoshoot in Rome includes advice on choosing locations, outfits, timing and photographers.
9. Keep Your Posture Long but Relaxed
Good posture makes almost every outfit and pose look better, but standing rigidly upright can be just as unflattering as slouching.
Imagine a thread gently lifting you from the crown of your head. Lengthen your spine, lower your shoulders and allow your chest to remain open. Avoid pulling your shoulders too far backwards, which can create tension through the neck and arms.
If you are sitting, move slightly towards the edge of the chair rather than sinking deeply into it. This naturally encourages a longer spine and prevents clothing from bunching around the middle. Take a breath before the picture is taken. Many people unknowingly raise their shoulders when they feel nervous.
10. Work Out Your Best Camera Height
The height of the camera changes the proportions of both the face and body. For a close-up portrait, positioning the camera at approximately eye level or slightly above often creates a flattering result. A camera held far below the face can emphasise the jaw and nostrils, while one held too high may distort the forehead and body.
For full-length outfit photographs, placing the camera somewhere around waist or chest height can help preserve natural proportions. Holding it too high may make the legs look shorter, while shooting from very low down can exaggerate the lower body.
The photographer should step backwards and use a moderate zoom rather than standing extremely close with a wide-angle lens. Smartphone cameras can distort features when held too near the face, particularly around the edges of the frame.
11. Avoid Standing Closest to a Wide-Angle Camera
In group photographs, the person closest to the lens often appears larger because of perspective distortion.
Try to stand on roughly the same plane as everyone else rather than several steps in front. If you are at the edge of the group, avoid leaning significantly towards the camera.
For selfies, hold the phone a little further away and use a modest zoom rather than placing it extremely close to your face. Keep your face near the centre of the frame, as wide-angle lenses tend to stretch subjects positioned near the edges.
When photographing several people, ask everyone to bring their faces to a similar distance from the lens.
12. Choose Clothes That Make You Feel Comfortable
An outfit does not need to be expensive or elaborate to photograph well. The most important factor is that it fits properly and allows you to move naturally.
Clothing that constantly needs adjusting will make you feel self-conscious and may affect your posture. Before the photograph, check for twisted straps, uneven hems, bunched fabric, visible undergarments or pockets that are sticking out.
Solid colours, subtle textures and simple patterns are generally easier to photograph than extremely busy prints. If the background is visually detailed, a simpler outfit helps prevent the image from feeling cluttered.
Consider how the colour will work with the setting. Cream, terracotta, soft blue and earthy tones can look beautiful against warm European architecture, while brighter shades may stand out against beaches, gardens and neutral urban backgrounds.
For holiday shoots, choose clothes that reflect the destination while still feeling like you. Our guide to packing properly for your next trip includes practical advice for organising clothing, beauty products and travel essentials.
13. Prepare Your Skin Without Overdoing It
Healthy, comfortable skin generally photographs better than skin covered in a heavy layer of unfamiliar products.
In the days before an important event or photoshoot, focus on hydration and products you already know work for you. Avoid experimenting with strong exfoliants, peels or new treatments immediately beforehand.
On the day, moisturise well and apply makeup in thin layers. A small amount of concealer, cream blush and softly defined brows may be all you need for an everyday photograph.
Very shiny areas can reflect strong light, so consider gently pressing translucent powder onto the centre of the forehead, around the nose and across the chin. Leave some natural luminosity on the higher points of the face rather than mattifying everything.
Our guide to unlocking beautiful skin explores skincare, nutrition, sleep and stress management, while these Hollywood skin tips offer more ideas for creating a healthy-looking glow.
14. Add Movement Instead of Holding a Pose
Some of the best photographs are captured between formal poses. Walk slowly towards the camera, look over your shoulder, adjust your jacket, turn towards a friend or allow your hair and clothing to move naturally. Movement can soften the body and create expressions that feel more spontaneous.
Ask the photographer to use burst mode or take several frames while you move. The first image may feel awkward, but the later ones often become more relaxed.
Movement is especially useful if you dislike staring directly into the lens. You can begin by looking away, then gradually turn towards the camera as photographs are being taken.
Try simple actions such as:
The aim is not to perform an elaborate routine. Small, controlled movements are enough.
15. Take More Photographs Than You Think You Need
Even professional photographers rarely rely on a single frame. Facial expressions change in fractions of a second, eyes blink and clothing shifts.
Take several photographs from the same position, making slight adjustments between each one. Change the angle of your shoulders, move your chin, alter the position of your hands and try both smiling and neutral expressions.
Review the images after a few minutes rather than after every single photograph. Constantly stopping to examine yourself can make you more self-conscious and interrupt the rhythm of the shoot.
Once you identify a pose or angle you like, repeat it with small variations. Over time, you will learn which positions feel comfortable and consistently work for you.
How to Look More Natural in Photographs
Looking natural does not necessarily mean standing completely still and hoping for the best. Most relaxed-looking photographs involve a little direction.
Start by placing your body at a slight angle, shifting your weight onto one leg and giving your hands something simple to do. Then take a breath, relax your jaw and look away from the camera.
Ask the photographer to begin shooting before you turn back towards the lens. This often captures a softer, less prepared expression.
It also helps to stop thinking about whether you look attractive. Instead, focus on what is happening around you. Listen to the person taking the photograph, notice the setting or interact with someone nearby.
The more present you feel, the less likely you are to adopt the tense expression that comes from closely monitoring yourself.
How to Look Better in Travel Photographs
Travel photographs often involve unfamiliar settings, unpredictable weather and limited time. A little preparation can help without turning the experience into a full production.
Research one or two attractive locations before you arrive, but leave room for spontaneous moments. Early morning is often quieter at popular landmarks and may offer softer light.
Wear comfortable shoes between locations and bring a small kit containing:
Do not spend the entire experience trying to create a perfect image. Photograph the unplanned details too: a café table, a market visit, a windy coastal walk or a quiet street discovered by accident.
Great travel photography should preserve how a place felt, not only prove that you stood in front of its best-known landmark. For more inspiration, explore our guides to the South of France, Sardinia and the Hamptons, all filled with photogenic towns, beaches and landscapes.
Common Photography Mistakes to Avoid
A few small habits can make photographs feel less flattering than they need to be.
Holding your breath
This creates tension through the mouth, neck and shoulders. Exhale gently just before the photograph is taken.
Pulling your head backwards
This shortens the neck and softens the jawline. Move your head very slightly forward instead.
Forcing a smile for too long
Reset your expression between photographs. Look away, relax your face and smile again when you are ready.
Standing completely square
Turn your body slightly and shift your weight to create a more natural shape.
Taking the picture too close
Move the camera further away and use a moderate zoom to reduce wide-angle distortion.
Ignoring the background
Check for bins, signs, poles, strangers or objects that appear to grow out of your head. Moving half a metre can transform the composition.
Overediting the final image
Adjusting brightness, contrast and crop can improve a photograph. Excessively smoothing skin or changing facial features can remove the character that made the image feel like you.
Frequently Asked Questions
Why do I look different in photographs than in the mirror?
A mirror shows a reversed version of your face, which is the version you see most frequently. Photographs usually show your face without that reversal, so small natural asymmetries may feel more noticeable to you. Camera lenses, distance, lighting and angle can also affect proportions.
What is the most flattering angle for a photograph?
There is no single angle that suits everyone, but turning the body approximately 30 to 45 degrees away from the camera is a reliable starting point. Keep the face directed towards the light and move the chin slightly forward and down.
Should the camera be above or below eye level?
For head-and-shoulder portraits, eye level or slightly above is generally flattering. For full-length photographs, positioning the camera around waist or chest height can help keep the body’s proportions looking natural.
How can I make my face look slimmer in pictures?
Turn your face slightly rather than presenting it completely straight to the camera. Move your chin gently forward and down, use soft frontal light and avoid placing the camera very close to your face.
How do I smile naturally in photographs?
Relax your jaw, exhale and think about something genuinely amusing or comforting. Looking away before turning towards the camera can also produce a more natural expression. Ask the photographer to take several frames while you talk or laugh.
Where should I look when having my photograph taken?
Look directly into the lens rather than at your own image on the screen. For a more candid result, look slightly past the camera, towards the light or at another person nearby.
What should I do with my hands in photographs?
Hold a small object, place one hand in a pocket, adjust your clothing, touch your hair or rest your hand lightly on a nearby surface. Keep the fingers soft and slightly separated.
What colours photograph best?
The best colour depends on your skin tone, the lighting and the background. Solid colours and subtle textures tend to photograph reliably. Consider choosing a shade that contrasts gently with the setting so you do not disappear into the background.
How can I look good in a group photograph?
Stand on the same plane as the other people, angle your body slightly and avoid leaning closer to the camera than everyone else. Create a little space around your arms while still connecting naturally with the group.
How can I become more confident in front of a camera?
Practise a few poses at home and identify the angles that feel comfortable. During the photograph, focus on your surroundings rather than analysing your appearance. Taking more pictures also helps because you are no longer relying on one supposedly perfect moment.
The Final Word
Looking better in photographs is not about hiding every perceived flaw or trying to become a different version of yourself. It is about understanding how light, posture, angles and movement translate through a camera.
Begin with soft light, turn your body slightly, relax your shoulders and allow yourself to move. Take enough photographs to get past the first few awkward frames and remember that the images you treasure most may not be the technically perfect ones. They are often the photographs in which you look happy, comfortable and completely yourself.
Share this:
Like this: